
Cihuatl is the Nahuatl word for woman and the name for this Blogger template. Cihuatl was designed for blogs, blogs about travel, health, technology, food or any topic in general. It has two main columns, one for the main column and one for the sidebar, but you can change the sidebar location or remove it without writing code. Cihuatl has two versions: The Pro version has more features and is easier to use and to customize but and the free version is total functional and also very flexible.
Content
Documentation
Templates options
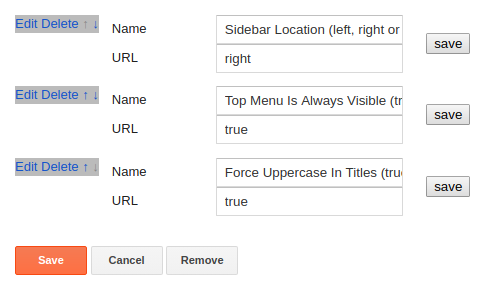
In this template you have a small gadget of Options related with some elements inside the template. These options are:
- Sidebar location. You can choose to display the sidebar on the right (default), on the left or hide it. So, in the URL field you could write: right, left or none.
- Top menu always visible (sticky menu). You can choose to always display the top menu (true) or not (false). In the URL field you could write: true or false.
- Force uppercase in titles. Transform posts titles, sidebar titles, etc to uppercase. In the URL field you could write: true or false.
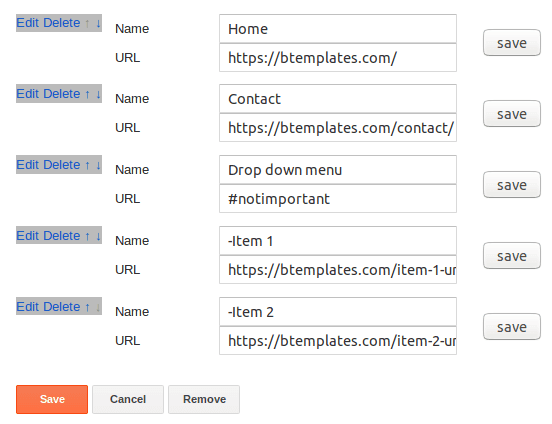
The main menu support drop down elements. It works based on a Links List gadget. So, to add a regular menu item (without drop down sub items) you just add a normal link, example: 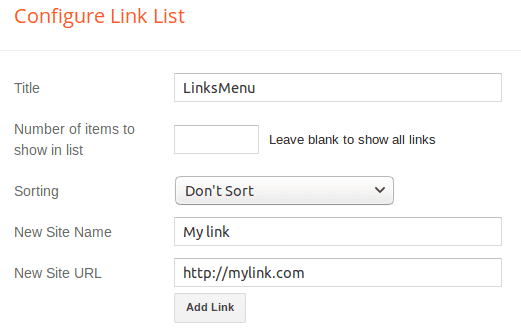 To add a menu item with ONE level drop down sub items:
1. Crate a regular link, in this case the URL is not relevant.
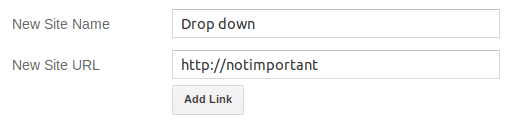
2. Create a second link, but this time add a dash at the beginning of the New Site Name field and the correspondent URL. This is going to be the first element of your drop down menu.
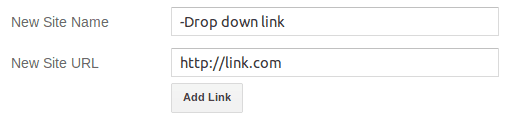
3. Add as many element as you need, but remember to add the dash at the beginning of each Site Name.
Full gadget example:
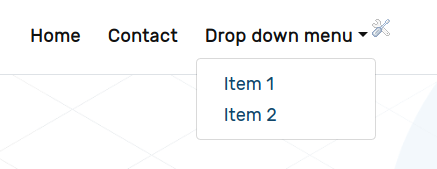
Result:
To add a menu item with TWO levels drop down sub items: 1. Crate a regular link, in this case the URL is not relevant.
2. Create a second link, but add ONE dash at the beginning of the New Site Name field and the correspondent URL. This is going to be the first element of your drop down menu.
3. Create a third link, but this time add TWO dash at the beginning of the New Site Name field and the correspondent URL. 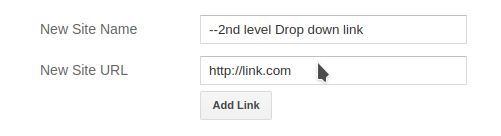 Full gadget example:
  Result:
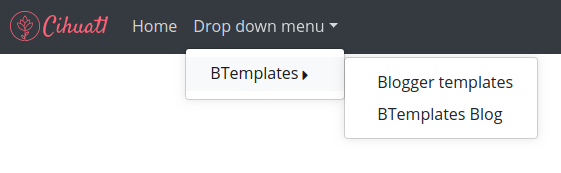
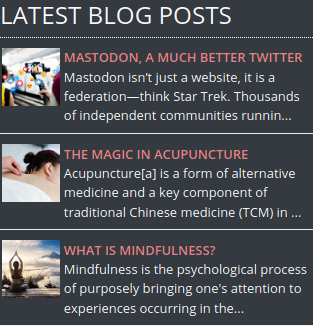
Slider

The slider uses a HTML gadget to work, it creates a list of posts: The latest posts in the blog (default) or the latest posts under a specific label. To edit the slider, go to Blogger / Layout and look for the Slider gadget, click edit and you’ll see this content:
4-latest-1110px-slider
Here you can replace “4” is the number of posts you want to display. “latest” indicates that the latest blog posts are going to be displayed; to display posts under a particular label replace “latest” with: tag:Name of the tag.
Example: To display the latest 3 posts under the label Women, the line will look like:
3-tag:Women-1110px-slider
Blog title or Logo
You can change, delete or add a logo to your blog going to your Blogger panel, then Layout, look for Page Header Gadget and clicking on edit.

You also can edit your Blog title and description with this option.
Gadget descriptions
Most gadgets in Blogger don’t allow you to add a text description on them, but sometimes a description is very useful. To add a text description under the title of any gadget, change the title of the gadget following this format:
Title-desc:DescriptionWhere:
- Title – Is the title you want for this widget.
- Description – Is the text description to display under the title.
Example: The Follow by Email widgets don’t have a field to add a description, to add one, we can write the following in the title field:
SUBSCRIBE-desc:Subscribe for Free to get all newest tutorials and lessons.The gadget would look like:
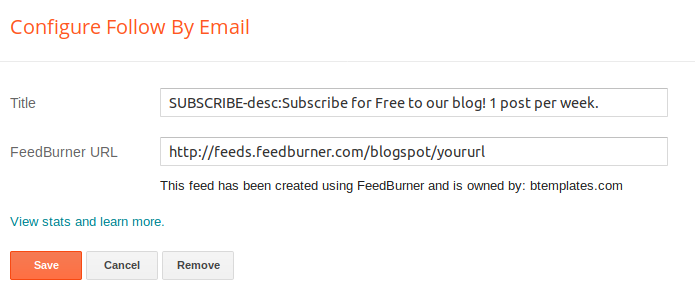
And the result would looks like: 
Blockquotes
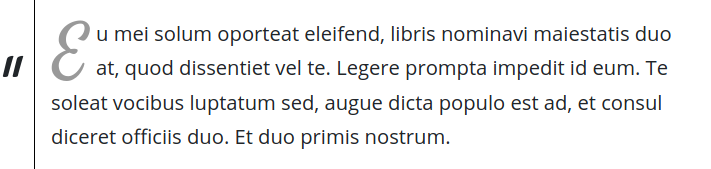
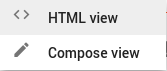
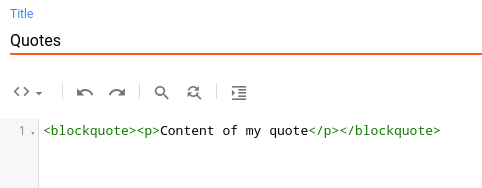
In order to display the Blockquotes with the right format inside a post, you need to use the posts editor in HTML mode:
HTML view on the Blogger editor.
And use the follow HTML structure:
<blockquote><p>Content of my quote</p></blockquote>
Code
In order to display code with the right format inside a post, you need to use the posts editor in HTML mode (see Blockquotes). And use the following HTML structure:
<code><span>This is my code & looks great</span></code>
List of posts inside a post
Sometimes is very useful to list the posts under a specific label, for example to display all the content related to an event or person. In this template you can create this list with just one line.
For example, to display the latest 50 posts inside the label “Women”, you just need to add inside you post this line: [posts--tag:Women--50] 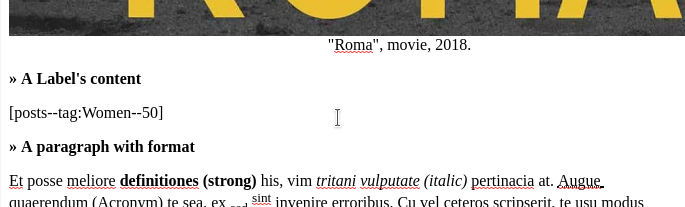
Similar to the slider, you can create lists with the latest blog posts or by label in the sidebar and/or footer. To create a new list of posts:
1. Go to Blogger/Layout and create a new HTML gadget. You can use whatever title you want.
2. In the gadget’s content: To display the latest blog posts use:
3-latest-65px
To display the latest posts in a specific label use:
3-tag:Label name-65px
Where “Label name” is the exact name of the label you want to use.
In both cases you can replace the number “3” with the number of posts you want to display.
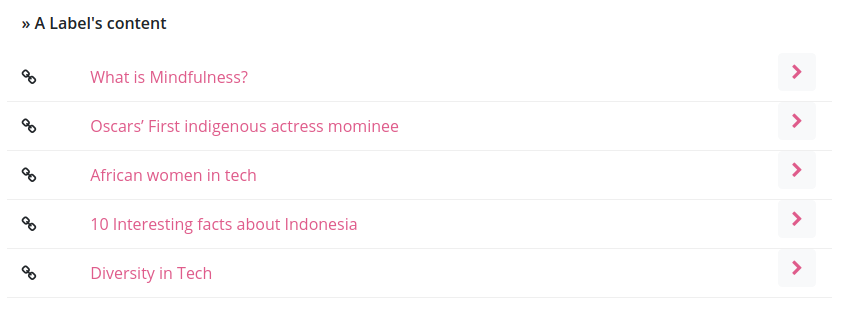
Labels’ galleries
Labels’ galleries work in the Pro version of the template. These galleries use the Labels gadget and what they do is to show a nicer list of labels with a preview image. This preview image corresponds to the image of the last post within that label.
These galleries make the reader’s navigation more friendly and make the appearance of the blog more dynamic, since they are updated every time a post is published within a label.
In the demo, it is the “Sections” section on the home page. And as a gadget in the footer, also with the name “Sections”.
To make any regular Labels gadget work as a Label’s gallery you need to add the text:
-BTLabelsat the end of the gadget’s title. Example: If the title is Sections, the final title will be Sections-BTLabels.
Like any label gadget, it is possible to display only the desired labels.
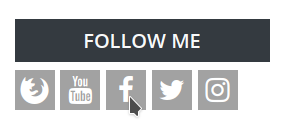
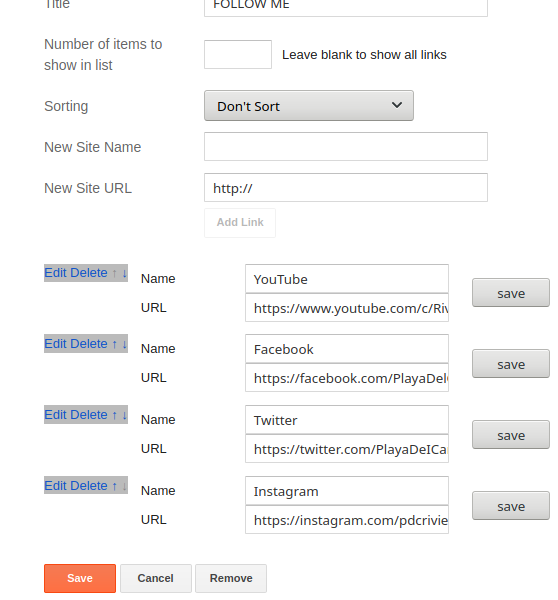
In this template you can add social icons to the sidebar or footer in a very easy way, you just need to edit or create a Links List gadget and add all your social media links there, then your links are going to be transformed in icons automatically.
Example:
Latest comments widget
To add a Latest comments widget you just need to add a new HTML gadget with the content following this format:
NumberOfComments-commentsWhere:
NumberOfComments is the number of comments you want to display.
Example, to add a list with the latest 3 comments the content in the HTML gadget would be:
3-commentsMain font family and colors
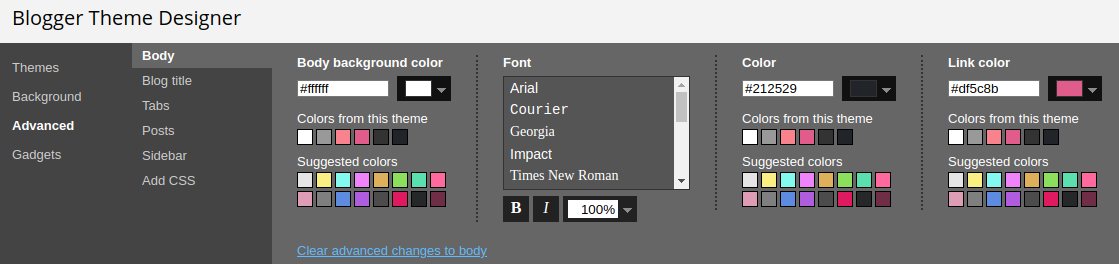
To edit the current main font family and the color of some of the elements in the template, in your Blogger dashboard go to Layout, the look for the link to the Theme Designer. Once there, go to Adjust widths, here you can change the font and some colors.
Changelog
- Version 1.1.3 – 20-12-2022 – Added social icons for Tiktok and Mastodon on Pro version. Minor Javascript bug fixed due to format change in image URLs. Minor CSS fixes.
- Version 1.1.2 – 19-02-2022 – Scripts fixed due to format change in image URLs
- Version 1.1.1 – 21-09-2021 – Mail subscription gadget removed due to Google’s questionable decision to discontinue it.
- Version 1.1 – 16-03-2021 – Fixed bug on dropdown menu when showing a second level item.
- Version 1.0 – 16-07-2020 – Initial release.