BTemplates, the best place for Blogger templates since 2008.
Preguntas Frecuentes Respondidas
Preguntas Frecuentes Respondidas
What’s the best way to install a Blogger template?
Here’s how to install a Blogger template in the updated interface (2020+):
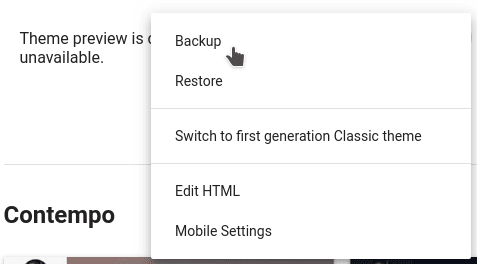
1. First, extract the downloaded template file using software like 7-Zip (available at 7-zip.org). 2. In your Blogger dashboard, navigate to the ‘Theme’ section. 3. Click the three-dot menu (⋮) in the top-right corner and select ‘Restore’ > ‘Upload’. 4. Choose the .xml file from your extracted folder and upload it.
Why am I getting errors when trying to install a template?
Common installation errors (like BX-xxxx codes) usually occur because:
Common Causes: – Uploading a non-XML file or corrupted archive – Attempting to copy-paste template code instead of uploading properly
Troubleshooting Steps: 1. Verify you’re uploading the correct .xml file 2. Remove any pre-installed gadgets/widgets from the template 3. Clear browser cookies/cache 4. Try Mozilla Firefox (often works best with Blogger) 5. Test with a different browser or device
If issues persist, contact your template provider for file verification.
How do I safely backup my current Blogger template?
Follow these steps to protect your existing design:
For New Blogger (2020+): 1. Go to Dashboard > Theme 2. Click ⋮ menu > Backup > Download 3. Save as [YourBlogName]-Backup-[Date].xml
For Classic Blogger: 1. Navigate to Theme section 2. Click ‘Backup/Restore’ button 3. Select ‘Download’
Extra Safety Measures: – Create a test blog for template experiments – Export widget content to text files – Store backups in multiple locations (cloud + local)
Remember: Backups preserve all theme settings and custom code!
Watch our video guides for visual walkthroughs: – Date Format Setup: youtube.com/watch?v=LmM-KKHwwKM – Timestamp Configuration: youtube.com/watch?v=5bqHjqzv5zE
If issues continue, check your template’s documentation for specific format requirements.
How do I translate my template to another language?
Translation requires both text and image adjustments:
Text Translation: 1. Access Theme HTML editor 2. Use browser search (Ctrl+F/Cmd+F) to find text strings 3. Replace English text with your translation 4. Repeat for all visible text elements
Image Translation: 1. Edit images using software like GIMP or InkScape 2. Upload new images to Blogger (via Posts or Pages) 3. Update image URLs in template code
Note: Some templates have built-in translation files – check documentation first before manual editing.
Template credits help support designers – here’s what you need to know:
1. Most free templates require visible credits under Creative Commons licenses 2. Some offer premium versions without attribution 3. You may: – Reposition credits (footer to sidebar) – Simplify text (keep links functional) – Purchase commercial licenses where available
Support developers by maintaining credits – many templates receive ongoing updates and support from their creators.