I think it’s always interesting give our buttons an animation effect. As in this tutorial, the RSS subscription button.
This time we will make an exercise to create a small character from the paper, through Adobe Illustrator, to its implementation on HTML and CSS. At the bottom of the page we leave a file with the images and the code for you, so you can implement it on your web if you want. (See demo)
Vectors and picture
Vectors have great advantages and latest versions of Illustrator are amazing, our designs will be more than colored spots.
I won’t deny the fact that knowing some drawing basics is helpful, but definitely the web is a summary with images to take ideas from, to see different techniques. To begin on making our projects, drawing helps, but good ideas are always better.
From sketch to Illustrator
Let’s begin sketching our character. This will help us to have an clearer idea on how to start. As I said before, you can take ideas from images you have seen before and you think they are interesting.
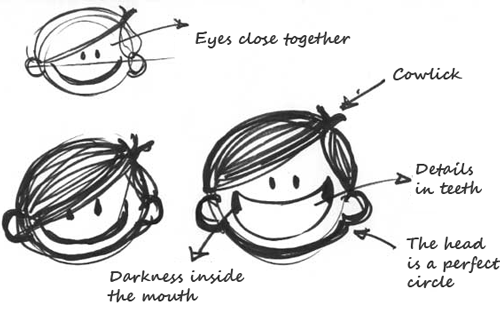
I can say I like to making it this way, sketching. I usually trace on Illustrator directly but at least I can get a clearer idea and I know what to do. A while ago I spent a lot of time in front of computer without having a clear idea on what to draw and because of that I lost time. Some sketches finished that.
We will start with basic shapes for head and ears, we’ll draw three circles together and then apply Pathfinder (Shift+Ctrl+F9 or Window → Pathfinder) and apply Unite.
We’ll trace eyes, two black, little circles will be enough, we’ll put them and center them, and then we’ll make hair.
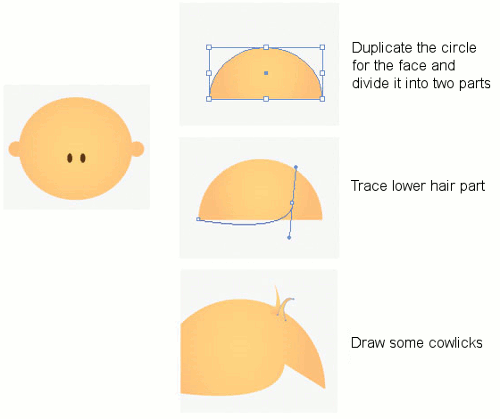
Now we’ll just color it and unite shapes.
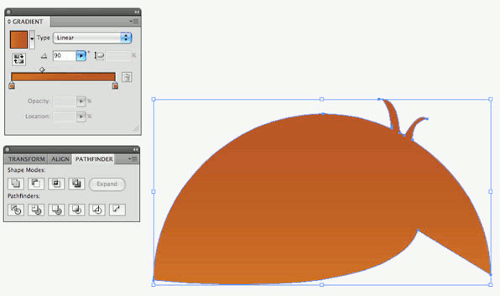
This is merely a guide. You should be able to create any character you want. I’m just showing you a boy.
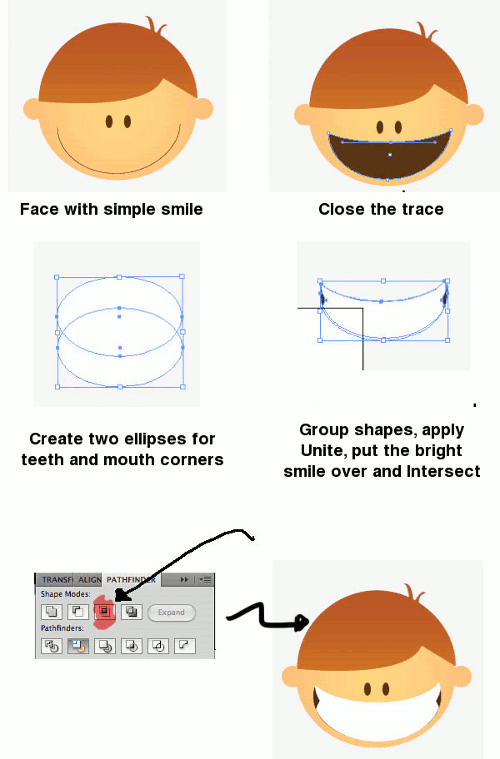
Now the interesting thing: the smile which will change. At first, we’ll make a simple smile (closed mouth); a half a circle will be enough, then we’ll make a bright smile. We duplicate our layer with the simple smile character and in the duplicated layer we do the following;
RSS icon and strokes
We’ll make our feed RSS icon which is the main reason for doing this illustration. We’re going to put it behind the character and in the final image the button will be released, so it will create a movement effect.
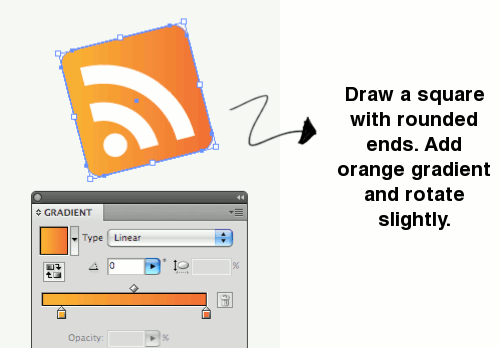
Now let’s make the final touches to our button, select the character, unite all the shapes using Pathfinder, fill it with any color and apply a thick stroke to the shape. Do the same to the RSS icon.
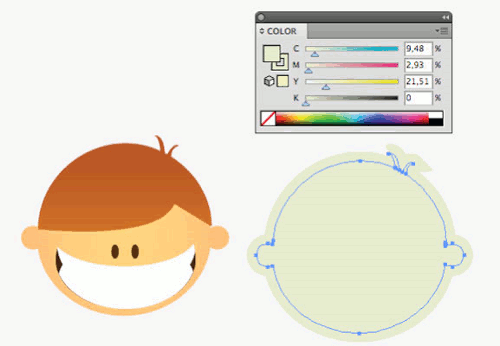
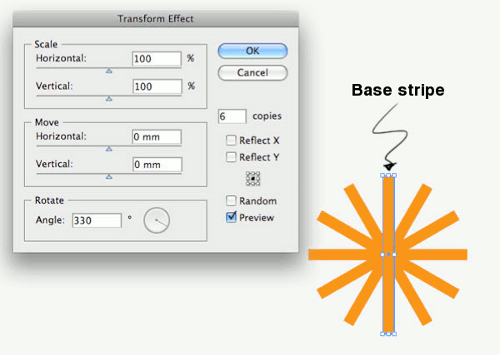
We’re going to make a sparkle that comes from behind the character. Draw a vertical stripe and apply Transform effect (Effects → Distor & Transform).
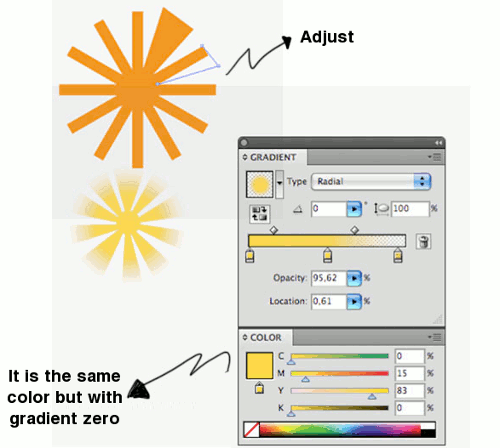
Expand the shape (Object → Expand Appearance) and apply Unite. Adjust some ends and add a gradient.
We’re finally add some text to make more obvious the rollover image, so we have now two images like these:

Implementing the button
From Illustrator export both images. The result, two images in web format like PNG8, in example. To make possible use them in a hover, both images must be the same size and be perfectly aligned, vertically and horizontally, and then join them together. In other words, if you put one over the other, their shapes should match.
We have put both images one above the other to use them as a CSS sprite.

For the HTML this code is enough:
<a href='https://btemplates.com/feed/' class='botonrss'>Feed RSS</a>The CSS will give the ‘hover’ effect, so when you pass the mouse pointer over the image, it will show the second image, giving the appearance of animation.
a.botonrss {
    width:166px;
    height:180px; /* Image size */
    text-indent:-9999px;
    overflow:hidden; /* Hiding the link text */
    display:block;
    background:url(images/rss-boton.png) no-repeat 0 0; /* Setting the image as a background */
}
a.botonrss:hover {
    background: url(images/rss-boton.png) no-repeat 0 -180px; /* When passing the mouse over, the image will be 'raised' */
}
Now, we just need to see the demo working.
Implement it on Blooger or WordPress
It’s really easy to implement it on Blogger or WordPress. The HTML code can be added to any widget on the sidebar. On WordPress, the CSS code is added to the style.css file and on Blogger after this code:
]]></b:skin>Don’t forget to change the URL for the one of your feed and the image routh in the CSS.
Download
Download HTML code and images.
Conclusion
In this tutorial we learned how to create an ‘animated’ button starting from the paper. Although tt may require some work, the final thing worth the effort.
In the same way, if you liked this button to use it on your website, download it and implement it. We released it under Creative Commons License, and if you want to link us giving proper credit, we will appreciate it in advance. 😀
By the way: this is the first tutorial we Ulises and Francisco make together, -mainly Ulises. We hope you have enjoy it like we did!
farharn May 3, 2011 at 6:43 am
it cant ..show me how to use it on widget html/java side bar..
dinosaur bedding August 12, 2011 at 6:06 am
i already copied the html and post it on java/html script at sidebar using blogger.. but it still can how??? dont have the picture but only the feed rss link
mohsin December 27, 2012 at 2:24 am
goood post