Tablet Desk Blogger Template
Instructions
About Tablet Desk
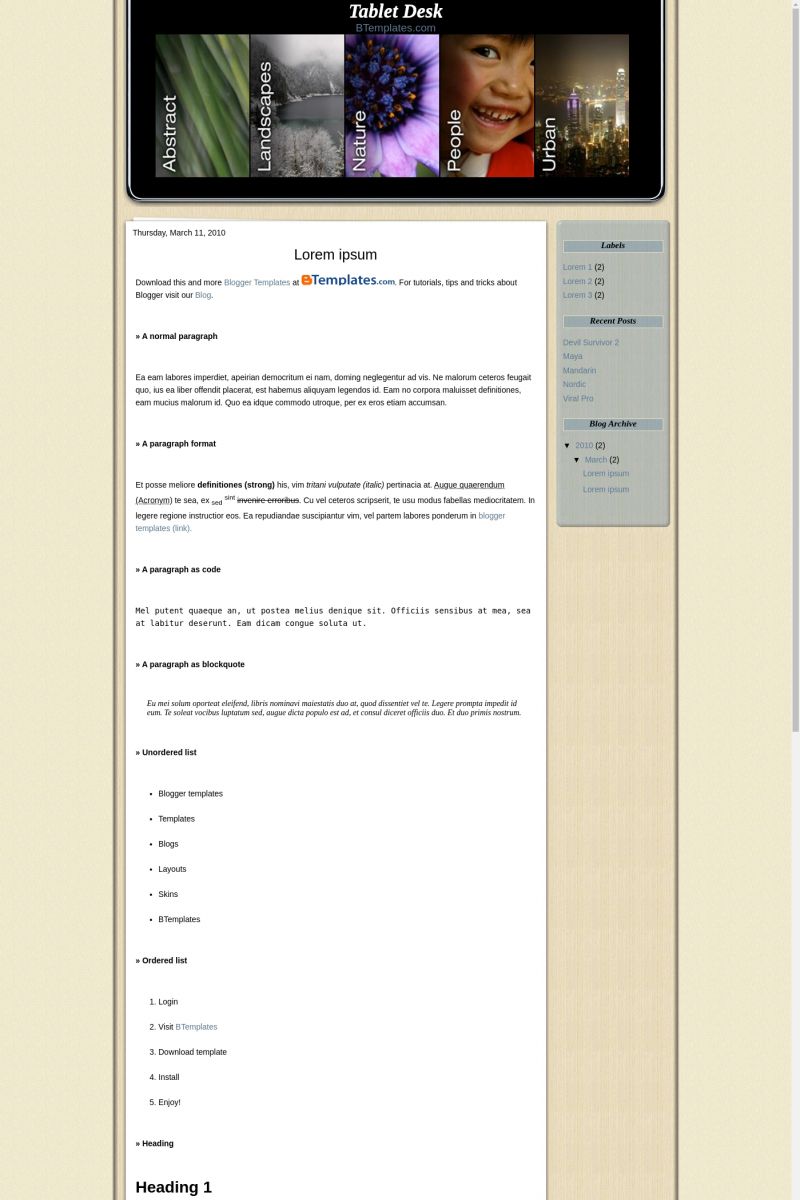
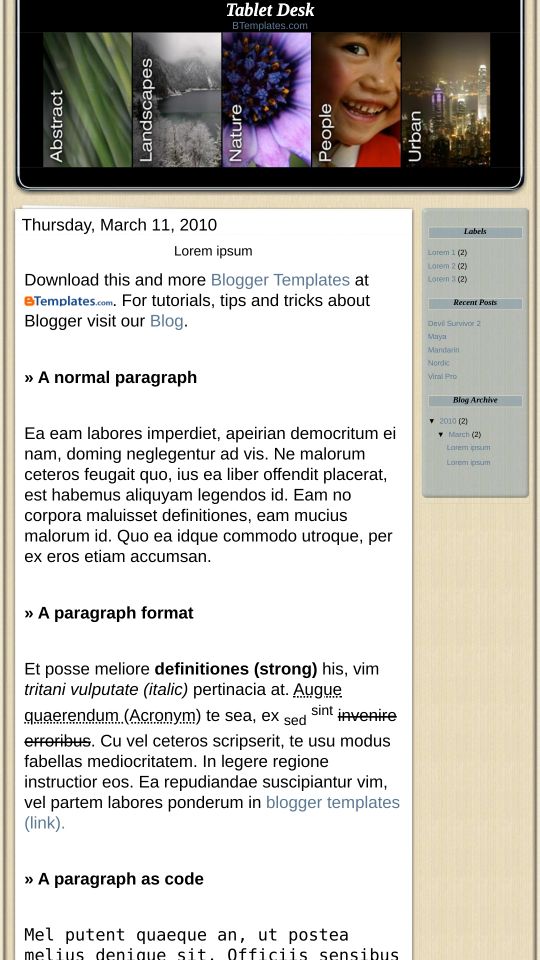
Introducing Tablet Desk, a free Blogger template featuring 2 columns, right sidebar, rounded corners and image slider
Perfect for blogs covering desktop.
Latest templates:
Credits
Author: Roam2Rome.



huz 29 April 2010 at 7:13
i like it. simple and easy to used. i using it for my blog. thank u so much.
edwin 29 April 2010 at 12:43
Nice Effect Slider .. How change image at top ?? use javascript jquery or other ?? please explain . thanks
Roam2Rome 29 April 2010 at 12:49
…By the way, there are 10 color options available for download.
You can also add a Header Image instead of the words (Layout > Page Elements > Header > Upload Image> and the tablet header will grow to any size.
Like I said above, instructions on how to change the images and links on the Sliding Image Menu are on the theme page.
Enjoy!
Roam2Rome 29 April 2010 at 15:41
My previous comment didn’t appear, so I’ll try this again.
For instructions, once you download the template, on the header you’ll see a link to the THEME PAGE.
You can:
*Change Images
*Change Number of Pages
*Change Links
*Add a Header BANNER
The header will grow to any size you need.
There are about 10 color options for the sidebar.
You can visit the Theme Page for step-by-step instructions on how to do this yourself. It’s not hard.
chris 29 April 2010 at 16:49
THe theme page doesnt come up for me ? Any other way i can see how to change it ? THanks Chris
Roam2Rome 29 April 2010 at 17:14
It’s somehow not allowing me to post the link here.
But when you download the theme, do you notice that when you upload the template, there’s info?
Blogger Template Style
Theme Name: Tablet Desk 1.0
Theme Author Email: roam_2_rome at hotmail
Theme Url: ——————– <== you'll see the Theme Page there
When you download the template, you can also right click and open with Word Pad and see it on first few lines.
Hope it helps!
Cartero 29 April 2010 at 22:20
Awesome template! thanks for your hard work
chadlys 30 April 2010 at 23:23
why i can’t widen the right sidebar, please help. its so small for me
swedrock 8 May 2010 at 18:15
Is there a way to add more than 5 images/links to the top? I’d like to make 7, if that’s possible.
Roam2Rome 8 May 2010 at 20:31
Yes. You can definitely add more images on the Image Menu.
Go to the theme page on my blog.
1) Notice the instructions where you changed the image files and image file and links? There’s
.opt1
.opt2
.opt3…
Make an .opt6, and more if you need on BOTH sections.
2) On kwicks you’ll also need to change the width.
Since the header is 820 pixels, and there were 5 images, it’s set to 164. For 6 images it’s around 134 (820/6 images).
#kwick .kwick {
–display: block;
–cursor: pointer;
–overflow: hidden;
–height: 250px;
–width: 164px; <======= Change width depending on # of images
zehra 9 May 2010 at 10:19
How do I change the color of the edge?
zehra 9 May 2010 at 10:24
@Roam2Rome: @Roam2Rome:
How do I change the color of the edge?
Roam2Rome 9 May 2010 at 11:26
I have about 10 different sidebar colors already made, but I must upload them to my site.
This week I have exams, but in the week-end I’ll take the time to post them for you :)
Remember: You can still upload a header image of any height, though I recommend 860 pixel width and it will show up above the sliding image menu.
zehra 9 May 2010 at 12:06
@Roam2Rome:
Thank you. I’ll be waiting impatiently for you to download.
ep 10 May 2010 at 10:46
Hi there. Love the template! I was just wondering, is there any way to make the 5th header image static? I get a strange flashing in my version of the template. Thanks for any suggestion you might have.
roam2rome 10 May 2010 at 16:01
if it flashes, it means it needs a little more room
so, maybe reduce the width size a pixel or two until it does not flash on the code below
#kwick .kwick {
–display: block;
–cursor: pointer;
–overflow: hidden;
–height: 250px;
–width: 164px; <======= Change width depending on # of images
ep 10 May 2010 at 17:47
@roam2rome:
Thanks! That did the trick.
amuletlori 10 May 2010 at 20:01
Hi! I love this template that you made!
Can you help me?
I did the step by step instructions on how to change the pictures.
I did upload the 5 pics I wanted to use on my blog, then I copied the links to the #kwick .opt1 … .opt2 … .opt3 …etc.
This is how it looks like for each .opt but it the pictures don’t show on my blog.
#kwick .opt1 }
outline: 0; background: #000000 url (https://1.bp.blogspot.com/_bPbVnO59Bbo/S-inYBda8xI/AAAAAAAAAE4/YuckoLryKGU/s1600/Global+Technology+1.png) ;}
}
Is this right?
ines 19 May 2010 at 8:53
Hi, I am really new to this but I like it.. :) Thank you.
I want to know if it is possible just to use the tablet and keep my normal template…Or how could have it in a darker template??
Thank you very much!
Cheryl 19 May 2010 at 10:12
Would appreciate if you could kindly look into the above URL… pls advise on how do i go about enabling the date of each post to appear at the top of the each post. ..
I have already check on the page element : blog post – edit – has appear to ve tick on the option for the date to appear n the post …. h/w it does didn’t.. please help….thk u
Roam2Rome 19 May 2010 at 11:34
@ines I will make a different design with the same tablet/sliding header in a month or two :)
@cheryl Date on top of posts => Go to your Blogger Dashboard
Settings => Formatting => Time Stamp (Choose a DATE format you like)
I chose Time Stamp instead of Date Stamp so that the date appears on top of every post, even if you write multiple posts on the same day.
Mainly because I made a page per post, and Date Stamp only prints the date once per day, so with multiple posts per day, the date did not appear on some. Now it does. But go to your Time Stamp settings.
James 20 May 2010 at 19:19
I love the template, but keep having a problem with changing out the photos. The photos are repeating when the accordian expands. Here’s my test page: http://testbluemarine2010.blogspot.com/
I’ve tried larger images, but same thing. Any thoughts?
Cheryl 20 May 2010 at 21:02
Hi Roam2Rome,
thanks for your prompt reply, yes it work now – that i ve the date appear on each post.
now i have hit another wall… how to I go about not showing the date of post of my PAGES.
I notice that your: http://www.roam2rome.com/p/tablet-desk-theme.html…. have no date of post at the top, while the rest of your regular post do ve the date.
thanks a million.
Roam2Rome 22 May 2010 at 22:37
@James:
Repeating with the accordion expands?
—————————————————————
—————————————————————
If you mean when the accordion expands more than the width of the picture, find this in the code:
Now, do you see {openWidth:400}? Change it to the width of the picture.
—————————————————————
—————————————————————
If the same picture is showing up again, and again, and again?
Then make sure when you pasted the links that you didn’t accidentally also paste like .opt 1 many times.
There must be an
kwick .opt1
kwick .opt2
kwick .opt3
kwick .opt4
kwick .opt4
on
/* CHANGE HEADER IMAGE LINKS HERE */
and
2 places. The first is the images… the second is the web address of what page should be opened.
—————————————————————
—————————————————————
If what you mean as that they “FLICKER” when the images expand, then:
Reduce the width size a pixel or two until it does not flash on the code below
#kwick .kwick {
–display: block;
–cursor: pointer;
–overflow: hidden;
–height: 250px;
–width: 164px; <======= Change width depending on # of images
zehra 23 May 2010 at 6:59
I’m still waiting for the colors of the edges.@Roam2Rome:
Luciano 23 May 2010 at 18:30
This template is to change the images that comes with it?
because I wanted to put images on the contents of my blog.
If possible could respond by my email?
Thanks
Roam2Rome 23 May 2010 at 19:38
@Luciano:
Yes, of course. You can change the images. That’s what it’s for! It’s funner when they are your own images…
My email address is on the template…
Roam2Rome 24 May 2010 at 21:26
Here’s one question I got by email. If your images don’t appear, it’s because you delted the “class” attribute.
So.. when you are posting the menu links… do NOT delete class=”kiwcks opt1″ …the links go on “href”
At the beginning of the code you pasted image links for
#kwick .opt1 (link to image)
#kwick .opt2 (link to image)
#kwick .opt3… (link to image)
On the second part (below) is where the magic happens. THIS is what shows up on your image menu blog (below)
!– HEADER LINKS CHANGE THE LINKS HERE –>
div id=’kwick’
ul class=’kwicks’
li a class=’kwick opt1′ href=’LINKS GO HERE’ title=”
li a class=’kwick opt2′ href=’#’ title=’Foolery’
li a class=”kwick opt3′ href=’#’ title=’Tweetin’
li a class=’kwick opt4′ href=’LINKS GO HERE’ title=”
li a class=’kwick opt5′ href=’LINKS GO HERE’ title=”
li a class=’kwick opt6′ href=’LINKS GO HERE’ title=”
!– END TABLET LINKS –>
See class=’kwick opt#’ that’s IMPORTANT. Don’t delete it. The links go on HREF.
The order doesn’t matter. It can be opt 1, opt 5, opt 2. Just so it’s there.
Sarah 27 May 2010 at 21:56
Hey, I love this… or rather the other one similar to this. I’m having some issues with the header though. I’ve tried making the header various sizes… 820, 860, 1000… but it won’t fit on top correctly.
I’ve put the URL for my blog above… any ideas? Thanks!
marcella 27 May 2010 at 22:14
Hello to all, I’m using this template, I could do all that adjustments would, however, in post-section can not I remove the time the posts, someone could give me a hint?
Roam2Rome 27 May 2010 at 23:31
@Marcella
Yes, yes, you *can* remove the time. Go to settings, and find “time stamp” and it wil give you about 5 options on how the date should look, and you can choose the date format.
It was done this way so date would show up even in cases of multiple posts done on the same day.
@Sarah
Oops. Yea. see that. I left the width of Tablet Desk on Clean Elegance. IOkay, here’s how to change that… See this code:
– #header img (line 165)
-margin-left: auto;
-margin-right: auto;
-max-width: 860px;
Change Max Width to 985px; That will do it.
Sarah 28 May 2010 at 11:10
Thanks for the prompt response! The header still isn’t sitting right. It’s just shifted a little bit over, doesn’t quite line up.
Also, this isn’t really important, but is there a way to make the entry titles allign to the left? I tried changing it in the code, but I also couldn’t get that to line up… it went all the way to the edge.
Thanks for your help!
Roam2Rome 28 May 2010 at 11:21
A, yes, I’m going to release Clean Elegance Theme again with the new tweaks.
There’s also a 3 column version of BOTH themes nearly ready.
RE: ENTRY TITLES
Hmm.. K. You can do this on “Post H3”
padding:00px 0px 22px; 0px;
Text-align:left;
See the 4th number on padding? That’s for padding on the left side. Add as many pixels as you want to not make it be totally left.
Be sure to check results across different browsers.
This theme does have javascript so the theme can recognize what browser the user has, and applies different code for different browsers, but that’s a long story….
Sarah 28 May 2010 at 14:35
Sorry to be such a continuing pain! The only issue with moving the post title over is that it seems to also move the bar you have underneath… making it jut out on the other side.
Roam2Rome 28 May 2010 at 16:14
@ Sarah
Yes. That’s what tweaking *any* theme is, moving one thing, means correcting other things, and then checking browser compatibility…
K. Email me.
sil 31 May 2010 at 21:31
heyy roam2rome i’ll wait your new 3 column version.. i like your template so much, but a 3 column is better..:)
TRKicks 1 June 2010 at 5:09
Congratulations for your template.
I wont to know if it’s possible remove timestamp from my posts.
Thank You.
rama 16 June 2010 at 5:57
how to change blog title in black magik template ?
Vi Arboleda 17 June 2010 at 8:49
I’ve been looking for a template similar to this. I loooooove it! thanks, thanks, thanks!
I hope i can modify it correctly.
all the best!
elge 26 June 2010 at 3:28
Hi! I’ve been trying to set up a blogger blog, using a new simple template. I can’t manage to tweak the date – the new html doesn’t contain such word at all :) Would like to change the font, colour and move the date on the right hand side of the main column. Is it possible at all? :))
Thanks :)
Diony 28 June 2010 at 8:58
please I am beginner in this branch of blog’se templates, I downloaded your template by the way is very beautiful, but I’m realizing shake the images of the header, and add links on my new model that is on your model, like I explain in detail how to proceed, thank you for your attention and look for answers …
Jessi 4 November 2010 at 11:58
@Roam2Rome:
I love this template and have uploaded it to my blog already. I’ve tried to get to your blog to get instructions on how to change the pictures and text in the header but your blog is private. Can you add my email so I can see how to do it? Thanks!
Nicole 26 March 2011 at 21:03
Did you ever find out how to change the images up top? I would love to use this if I can change the pics up top. ~ @edwin:
Jelly 30 June 2011 at 2:13
Is there a way to add a link to OLDER POSTS at the bottom of the page? Thank you!
Jelly 30 June 2011 at 2:14
@Nicole: You can change the images by uploading your own photos and copying the image location of those photos.
She also wrote this:
At the beginning of the code you pasted image links for
#kwick .opt1 (link to image)
#kwick .opt2 (link to image)
#kwick .opt3… (link to image)
On the second part (below) is where the magic happens. THIS is what shows up on your image menu blog (below)
!– HEADER LINKS CHANGE THE LINKS HERE –>
div id=’kwick’
ul class=’kwicks’
li a class=’kwick opt1′ href=’LINKS GO HERE’ title=”
li a class=’kwick opt2′ href=’#’ title=’Foolery’
li a class=”kwick opt3′ href=’#’ title=’Tweetin’
li a class=’kwick opt4′ href=’LINKS GO HERE’ title=”
li a class=’kwick opt5′ href=’LINKS GO HERE’ title=”
li a class=’kwick opt6′ href=’LINKS GO HERE’ title=”
!– END TABLET LINKS –>
Phyllis Melendez 23 August 2014 at 12:19
Hello, Love your template. Do the images have to be certain size or formatted somehow to get that special portion of the image to show up perfectly centered up top, like the two children in your people image? If so what are the dimensions? Thank you!!